
Replacing a shower cartridge does not require a high level of professional skill. It may take up to 2 hours for a beginner to fix a shower cartridge. There are different types of shower cartridge are available in the market.
Shower cartridge types: At first, you have to identify which are you using. It can be a single-handle faucet, double handle, or even a three-handle faucet.
There are also two types of connections between the showerhead pipe and the plumbing set. One is a handset & another is fixed. Remove the handle and escutcheon to determine the cartridge type.
How to Replace Shower Cartridge
After researching we found a few signs of a bad shower cartridge that will help to determine if your shower cartridge is bad.
- If you notice that water pressure is not sufficient.
- Hot or cold water control is not working properly.
- Water drips from the shower or the valve when the tap is turned off.
Follow our easy steps below to replace a shower cartridge and keep your faucet running smoothly.
Equipment / Tools You’ll Need
- A Screwdriver
- A Hex wrench
- Groove-joint pliers
- Shower Cartridge puller
- Silicone grease (optional)
- Towel (optional)
Instructions
Step 1: Shut Off The Water Supply
Turn off the main water supply. If your apartment has individual valves station for each unit, shutting it off is enough. Then run your tap for 1 minute to drain all the water. Before starting the next steps, cover the bathtub drains with a towel to avoid accidentally dropping anything down there.
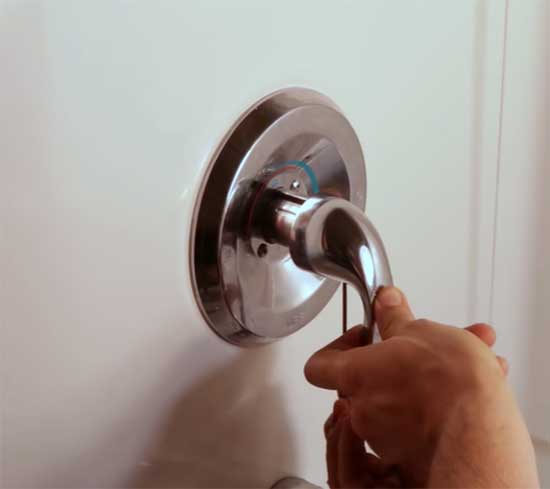
Step 2: Remove Shower Handle & Escutcheon

Use a hex wrench to remove the handle. Remove the screws holding the escutcheon. Some model requires a flathead screwdriver to remove the handle. Sometimes they are included in a repair kit.
Escutcheon is a piece of metal that covers the hole in your shower’s wall. Slide out the escutcheon to remove it from the wall.
Step 3: Remove The Retaining Clip
Use a small screwdriver to remove the small clip holding the cartridge behind the shower handle. Some models could be different.
Step 4: Remove Shower Cartridge Using Puller Tool

There are a few old models which can be removed with pliers. But the best way is to use a cartridge-pulling wrench. Before removing the cartridge, note the cartridge’s orientation for the new cartridge to be set in the orientation. It is required to ensure cold and hot water comes out the same way. Slowly turn the puller tool to loosen it.
Step 5: Installing New Shower Cartridge
Sometimes, shower cartridges could be repaired by replacing the O-rings to prevent water leaks. Check if they can be repaired.
Buy a new shower cartridge matching your old cartridge. Use a few greases to the new cartridge. Then carefully insert the new cartridge oriented like the previous one. Finally, slide the retaining clip, reassemble the handle and escutcheon and screw them.
Once everything is okay like the previous one. Turn on the water supply and check if everything is fine.
Related: How to Clean Plastic Shower Curtain [Pro Tips]
Common Questions Answered (CQA)
How Long Does It Take to Replace a Shower Cartridge?
Replacing a shower cartridge may take up to 2 hours.
How Much Does It Cost to Replace a Shower Cartridge?
Replacing an old shower cartridge may cost $50-$100.
How Do You Know When To Replace the Shower Cartridge?
Water drips from the shower. 2. Water pressure not working properly. 3. Water temperature not working properly.
You may like:
How to Clean Velvet Couch [Expert Cleaner Guides]
Best Way to Keep Ice Cream Frozen in A Cooler
Easy Homemade Air Conditioner without Ice Using a Fan
References we used:
https://www.morningtobed.com/signs-of-a-bad-shower-valve
https://highshower.com/type-of-shower-valve